







In today’s visually driven marketplace, the ability to showcase products effectively can make a significant difference in consumer engagement and sales. High-quality images with appealing backgrounds are essential for drawing in potential customers. This blog post will guide you through the process of utilizing AWS Bedrock to dynamically change the background of product images within an Angular application. We will cover the architecture, implementation details, and code snippets, ensuring you have a comprehensive understanding of how to achieve this.
Table of Contents
1. Introduction to AWS Bedrock
2. Project Overview
3. Architecture Design
4. Setting Up the Angular Application
5. Creating the AWS Lambda Function
6. Configuring API Gateway
7. Testing the Application
8. Conclusion
Introduction to AWS Bedrock
AWS Bedrock is a powerful service designed to simplify the integration of machine learning models into applications. With its user-friendly interface and robust functionality, developers can leverage pre-trained models for various tasks, including image generation, editing, and search capabilities. In our project, we utilize the Titan model, which excels in generating high-quality, realistic images. By harnessing AWS Bedrock, we can easily manipulate images, making it an ideal choice for our background replacement project.
Project Overview
The primary objective of this project is to create a seamless user experience where customers can upload product images, specify their desired background, and have the image processed in real-time. This involves several steps:
1. Image Upload: Users can upload an image of the product.
2. Background Specification: Users can provide text or select options to specify the desired background.
3. Image Processing: An API Gateway triggers a Lambda function that processes the image using AWS Bedrock and the Titan model.
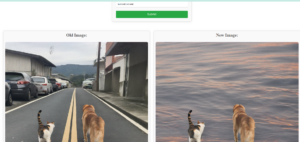
4. Result Delivery: The Lambda function returns the URLs of both the original and modified images stored in Amazon S3.
By combining these components, we can build a dynamic image processing application that enhances product presentation.
Architecture Design
The architecture of our solution consists of an Angular frontend, AWS Lambda for backend processing, and API Gateway for communication between the two. Here’s an overview of the architecture:
Component Breakdown
- Angular Application: The client-side application where users interact with the interface to upload images and specify background preferences.
- API Gateway: Serves as the intermediary, forwarding requests from the Angular application to the Lambda function and returning responses back to the client.
- AWS Lambda: The serverless function that processes the image using AWS Bedrock and the Titan model, handling the logic for image modification and storage.
- Amazon S3: A scalable storage solution for saving both the original and modified images, providing accessible URLs for the frontend.
Setting Up the Angular Application
Angular Component Structure
To begin, we will create a component within our Angular application that will handle image uploads and background specifications. Below is a basic outline of the component’s structure.
Angular Component Code
import { Component, OnInit } from ‘@angular/core’;
import { HttpClient } from ‘@angular/common/http’;
@Component({
selector: ‘app-image-uploader’,
templateUrl: ‘./image-uploader.component.html’,
styleUrls: [‘./image-uploader.component.css’]
})
export class ImageUploaderComponent implements OnInit {
backgroundText: string = ”;
base64Image: string = ”;
responseUrls: any;
loading = false; // Loader visibility control
constructor(private http: HttpClient) {}
onFileSelected(event: any) {
const file: File = event.target.files[0];
if (file) {
const reader = new FileReader();
reader.onload = (e: any) => {
this.base64Image = e.target.result.split(‘,’)[1]; // Extract base64 part
};
reader.readAsDataURL(file); // Convert file to base64
}
}
onSubmit() {
const payload = {
image: {
filename: ‘uploaded_image.png’,
body: this.base64Image
},
backgroundText: this.backgroundText
};
this.loading = true; // Show the loader
// Call the API Gateway
this.http.post<any>(‘https://Your api gateway url/prod/image’, payload)
.subscribe(
response => {
this.responseUrls = JSON.parse(response.body);
this.loading = false; // Hide the loader
},
error => {
console.error(‘Error:’, error);
this.loading = false; // Hide the loader in case of error
}
);
}
ngOnInit(): void {
}
}
HTML Template
The accompanying HTML template provides a simple interface for users to upload an image and specify a background:
<app-loader [loading]=“loading”>app-loader>
<form (ngSubmit)=“onSubmit()” enctype=“multipart/form-data”>
<div>
<label for=“image”>Upload Image:label>
<input type=“file” (change)=“onFileSelected($event)” required />
div>
<div>
<label for=“background”>Background Text:label>
<input type=“text” [(ngModel)]=“backgroundText” name=“background” required />
div>
<button type=“submit”>Submitbutton>
form>
<div *ngIf=“responseUrls” class=“image-row”>
<div class=“image-item”>
<h3>Old Image:h3>
<img [src]=“responseUrls.oldImageUrl” alt=“Old Image” />
div>
<div class=“image-item”>
<h3>New Image:h3>
<img [src]=“responseUrls.newImageUrl” alt=“New Image” />
div>
div>

Creating the AWS Lambda Function
Once the Angular frontend is ready, the next step is to create the AWS Lambda function responsible for processing the uploaded image.
Lambda Function Code
The Lambda function will utilize AWS Bedrock and the Titan model to perform the image background replacement. Below is a sample implementation in Python:
import boto3
import base64
import json
# Initialize boto3 clients
s3_client = boto3.client(‘s3’)
bedrock_client = boto3.client(‘bedrock-runtime’)
def lambda_handler(event, context):
# Extract the file and background text from the event
image_file = event[‘image’] # Assuming image is coming as binary/base64 string in event
background_text = event[‘backgroundText’]
# Set the bucket and S3 paths
bucket_name = ‘your bucket name’
input_image_key = f“data/titan/{image_file[‘filename’]}” # Input image path
output_image_key = f“outpainted_data/titan/{image_file[‘filename’]}” # Output image path
# Store the uploaded image in S3 (input image)
s3_client.put_object(
Bucket=bucket_name,
Key=input_image_key,
Body=base64.b64decode(image_file[‘body’]), # Decoding the base64 encoded image data
ContentType=‘image/png’
)
# Prepare the image content for Bedrock outpainting
input_image_base64 = image_file[‘body’] # Assuming the body is base64 encoded
# Define the payload for Bedrock
payload = {
“taskType”: “OUTPAINTING”,
“outPaintingParams”: {
“text”: background_text, # Text for the new background
“image”: input_image_base64, # Base64 encoded input image
“maskPrompt”: “dog cat”,
“outPaintingMode”: “PRECISE” # Specify the mode
},
}
# Invoke the Bedrock outpainting model
bedrock_response = bedrock_client.invoke_model(
modelId=‘amazon.titan-image-generator-v1’, # The model ID for outpainting
body=json.dumps(payload),
accept=“application/json”,
contentType=“application/json”
)
# Parse the response and decode the new image
response_body = json.loads(bedrock_response[‘body’].read())
new_image_base64 = response_body[‘images’][0] # Assuming the first image in the response
new_image_data = base64.b64decode(new_image_base64)
# Save the newly generated image (output image) to S3
s3_client.put_object(
Bucket=bucket_name,
Key=output_image_key,
Body=new_image_data,
ContentType=‘image/png’
)
# Construct the URLs for both old and new images
base_url = f“https://{bucket_name}.s3.amazonaws.com”
old_image_url = f“{base_url}/{input_image_key}”
new_image_url = f“{base_url}/{output_image_key}”
# Return the URLs of both old and new images
return {
“statusCode”: 200,
“body”: json.dumps({
“oldImageUrl”: old_image_url,
“newImageUrl”: new_image_url
})
}
Key Considerations
- Image Handling: Depending on your implementation, you may need to handle the uploaded image as a base64 string or an S3 URL. Adjust the Lambda code accordingly.
- Error Handling: Implement robust error handling to manage potential issues during image processing and storage.
- Titan Model Usage: The Titan model within AWS Bedrock is optimized for high-quality image generation, allowing for sophisticated background replacement techniques that can yield impressive results.
Configuring API Gateway
To connect the Angular application with the Lambda function, we need to configure the AWS API Gateway.
Steps to Set Up API Gateway
- Create a New API: Navigate to AWS API Gateway and create a new API.
- Define Resources and Methods: Add a resource (e.g., /change-background) and define a POST method linked to the Lambda function.
- Enable CORS: To allow requests from your Angular application, ensure CORS is enabled for your API methods.
- Deploy the API: Deploy the API to make it accessible, and note the endpoint URL for your Angular application.
Testing the Application
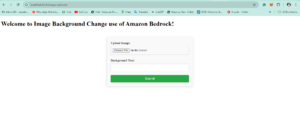
After setting up the Angular application, Lambda function, and API Gateway, it’s time to test the full workflow:
- Launch the Angular application.
- Upload a product image and specify a desired background.
- Click the “Change Background” button and monitor the console for processed image URLs.
- Verify the results in the S3 bucket to confirm the images were processed and stored correctly.
Conclusion and Future Enhancements
This guide illustrates how to integrate AWS Bedrock and the Titan model into an Angular application for dynamic image background replacement. By leveraging AWS services, we created a user-friendly solution that enhances product presentation and engagement.